Installing dash camera using a hardwiring kit is the most common installation method to power ON the dash camera when the vehicle is OFF, thus, providing parking-mode recording, especially for dash cameras that come with parking-mode recording feature.
Modern dash cams come with hardwiring kits and have become extensively accepted over the years for drivers who want safeguard for their vehicles 24×7. They offer power to your dash camera, shields battery discharge, and facilitate your dash camera to be your secret witness when you’re not around.
Note: If your vehicle’s battery is smaller or older, then you should install a dash camera battery pack.
Step 1: Find Out Where Your Vehicle’s Fuse Box Is
- To find the location of the fuse box, refer to your car’s owner manual or online. You may need to take out some trim or open some panels to get access to the fuses, but this may vary between vehicle make and models.
- These boxes will open by just lifting a tab or pulling a panel with your fingers, while other vehicles may need meddling with a trim tool.
Step 2: Fuse Slot That Needs To Be Used
Next, you need to identify which fuse slot you need to use. Fuse slots rated between 10A – 30A should be ideally chosen, so they can provide sufficient power to your dash camera. Make it a point to refer to the vehicle owner’s manual to avoid using fuse slots that could be associated with particular safety features within your vehicle.
For instance, refrain from using fuses that handle the horn, airbags and stability control programs, etc. Fuses that control certain components like the garage door opener, sunroof, radio etc. are typically safe to use.
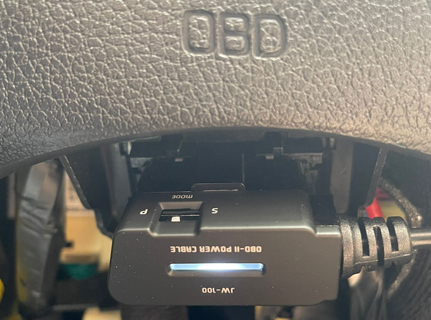
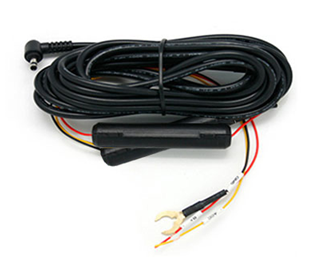
Three wires need to be connected for almost all types of hardwiring kits. One of the wires goes to a constant fuse; another wire goes to an ignition-switched fuse and the last wire goes to a metal ground bolt.
A constant fuse stays on, hence, continues to deliver power even when the vehicle is OFF and motionless, an ignition-switched fuse switches OFF when the vehicle is OFF and a ground metal bolt put off the electric shock. Besides, you may also find some hardwiring kits with just two wires that include a constant or ignition-switched wire or continually a ground wire. You may use a circuit tester or similar to test and check which fuse is stable and which is ignition-switched. A constant fuse will remain ON when the vehicle is OFF and vice versa for the ignition-switched fuse. An appropriate ground bolt ought to be of metal only and shouldn’t be attached to other materials like plastic.
Once the right type of fuses has been chosen, join one wire from your hardwiring kit to a constant fuse, which is usually red colour. The other wire will go into an ACC/ignition-switched fuse, which is usually yellow colour. The last wire, which is in the shape of a ring or a C, should be connected to the metal ground bolt. Before proceeding, it’s better to read the labels. This installation method is largely used, which makes your fuses more secure and long-lasting.
Besides, you can also cover the wires around the leg of the fuse – wrap it many times so that the connection is steady and secure. Then, put the fuse back into the fuse slot from where the fuse came out.
Step 3: For a Cleaner Installation, Use Add-A-Fuse Kit
Once you have finalised which fuse slots you require to use for your hardwiring kit you can tuck in your hardwire kit onto the Add-A-Fuse Kit. You will be able to tuck the fuse kit with a standard needle nose-plier. To secure the wire further, we also recommend using electrical tape.
Note: If the fuse slot you’re using has an existing fuse in it, insert that fuse in the lower fuse slot of the Add-A-Fuse and plug the new setup into the fuse box within the right orientation. As per your vehicle make and model, you may require narrowing down which Add-A-Fuse Kit is perfect for you. Variants include Low Profile, Mini, Micro2 and ATO. Refer your vehicle’s owner manual to know which fuse is perfect for your vehicle.
Step 4: Grounding the Hardwire Kit
After connecting the power of your hardwiring kit, you can now connect the ground wire, normally in the shape of a ‘ring’ or a ‘C’, to slide under a metal bolt or screw in your vehicle.
Normally, you will need a set of a socket wrench to loosen the nut or bolt that you picked to ground with. The common sizes are 10mm and 12mm although some German vehicles may need a Torx (six-pointed star) bolts.
To connect the grounding terminal, unfasten the nut or bolt sufficiently to slide it in and fasten it back up afterwards. Loose-ground can result in power issues for your dash cam. Grounding with a bolt-on an unpainted bare metal gives the best result. If an inappropriate ground is selected, it may cause your dash camera to restart when the power is not able to flow continually.
Even if the bolt is metal – if the grounding terminal of the hardwiring kit is fixed firmly onto a plastic surface, you may come across issues. In case, you can locate a factory ground, this is a perfect grounding place for your hardwiring kit.
Step 5: Check Out Your Dash Camera by Testing It
After you have fixed the power and ground, plug the kit into your camera and initiate your vehicle to see if it operates as intended. If it operates, you can run and insert all the wires in your vehicle. Then, fastening or zip-tying the excess wires out of the way in your vehicle are recommended, so it doesn’t hinder any access to your fuse box. Ensure wires aren’t slackly hanging where they may be kicked when you’re getting in or out of the vehicle as this can inflict damage to your vehicle or hardwiring kit.
Note: Don’t wait until after you have inserted all of your writing to plug in and test your camera as it will be simpler to troubleshoot when the wires can be conveniently accessed.
That’s it! Once you complete all the above-mentioned steps, you would successfully install your dash cam using your hardwiring kit.
If you’re looking to purchase a brand new dash camera for your car, browse our high-quality and top-performing dash cams for cars that work like a charm.